Driving Base
Our driving base consists of all
LEGO parts (found in th Mindstorm Robotics Invention Kit) except for the
wheel bearings. The wheel bearings are made of metal and Lego rod
pieces.
The parts are as follows:
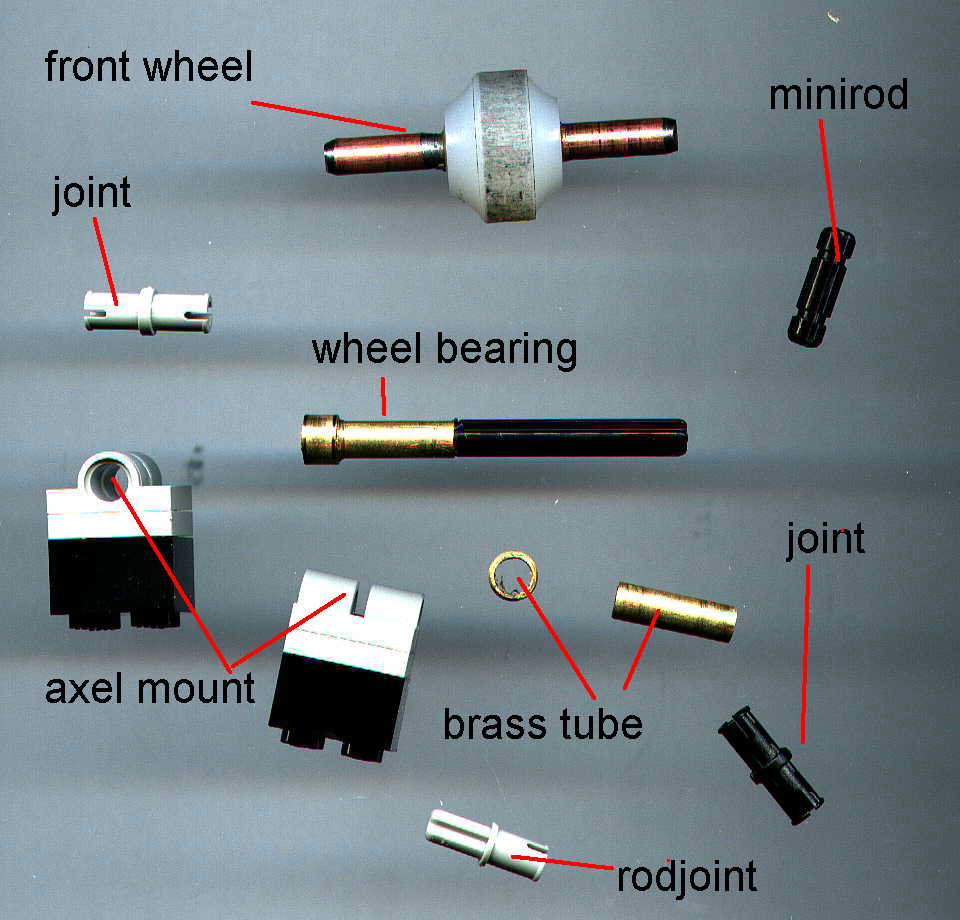
- 2 (1x16) black beams (beams have holes along their sides)
- 3 (1x4) black beams
- 2 (1x8) plates
- 2 grey joints
- 2 (1x2) yellow bricks (with holes on sides)
- 6 (1x2) grey plates
- 2 (1x2) motor mounts (like a grey 1x2 plate with
extending side peice that inserts into gap in motor to secure it)
- 1 (1x6) black beam (2 more 1x6
beams will be used for outer supports on the brick at the end of construction)
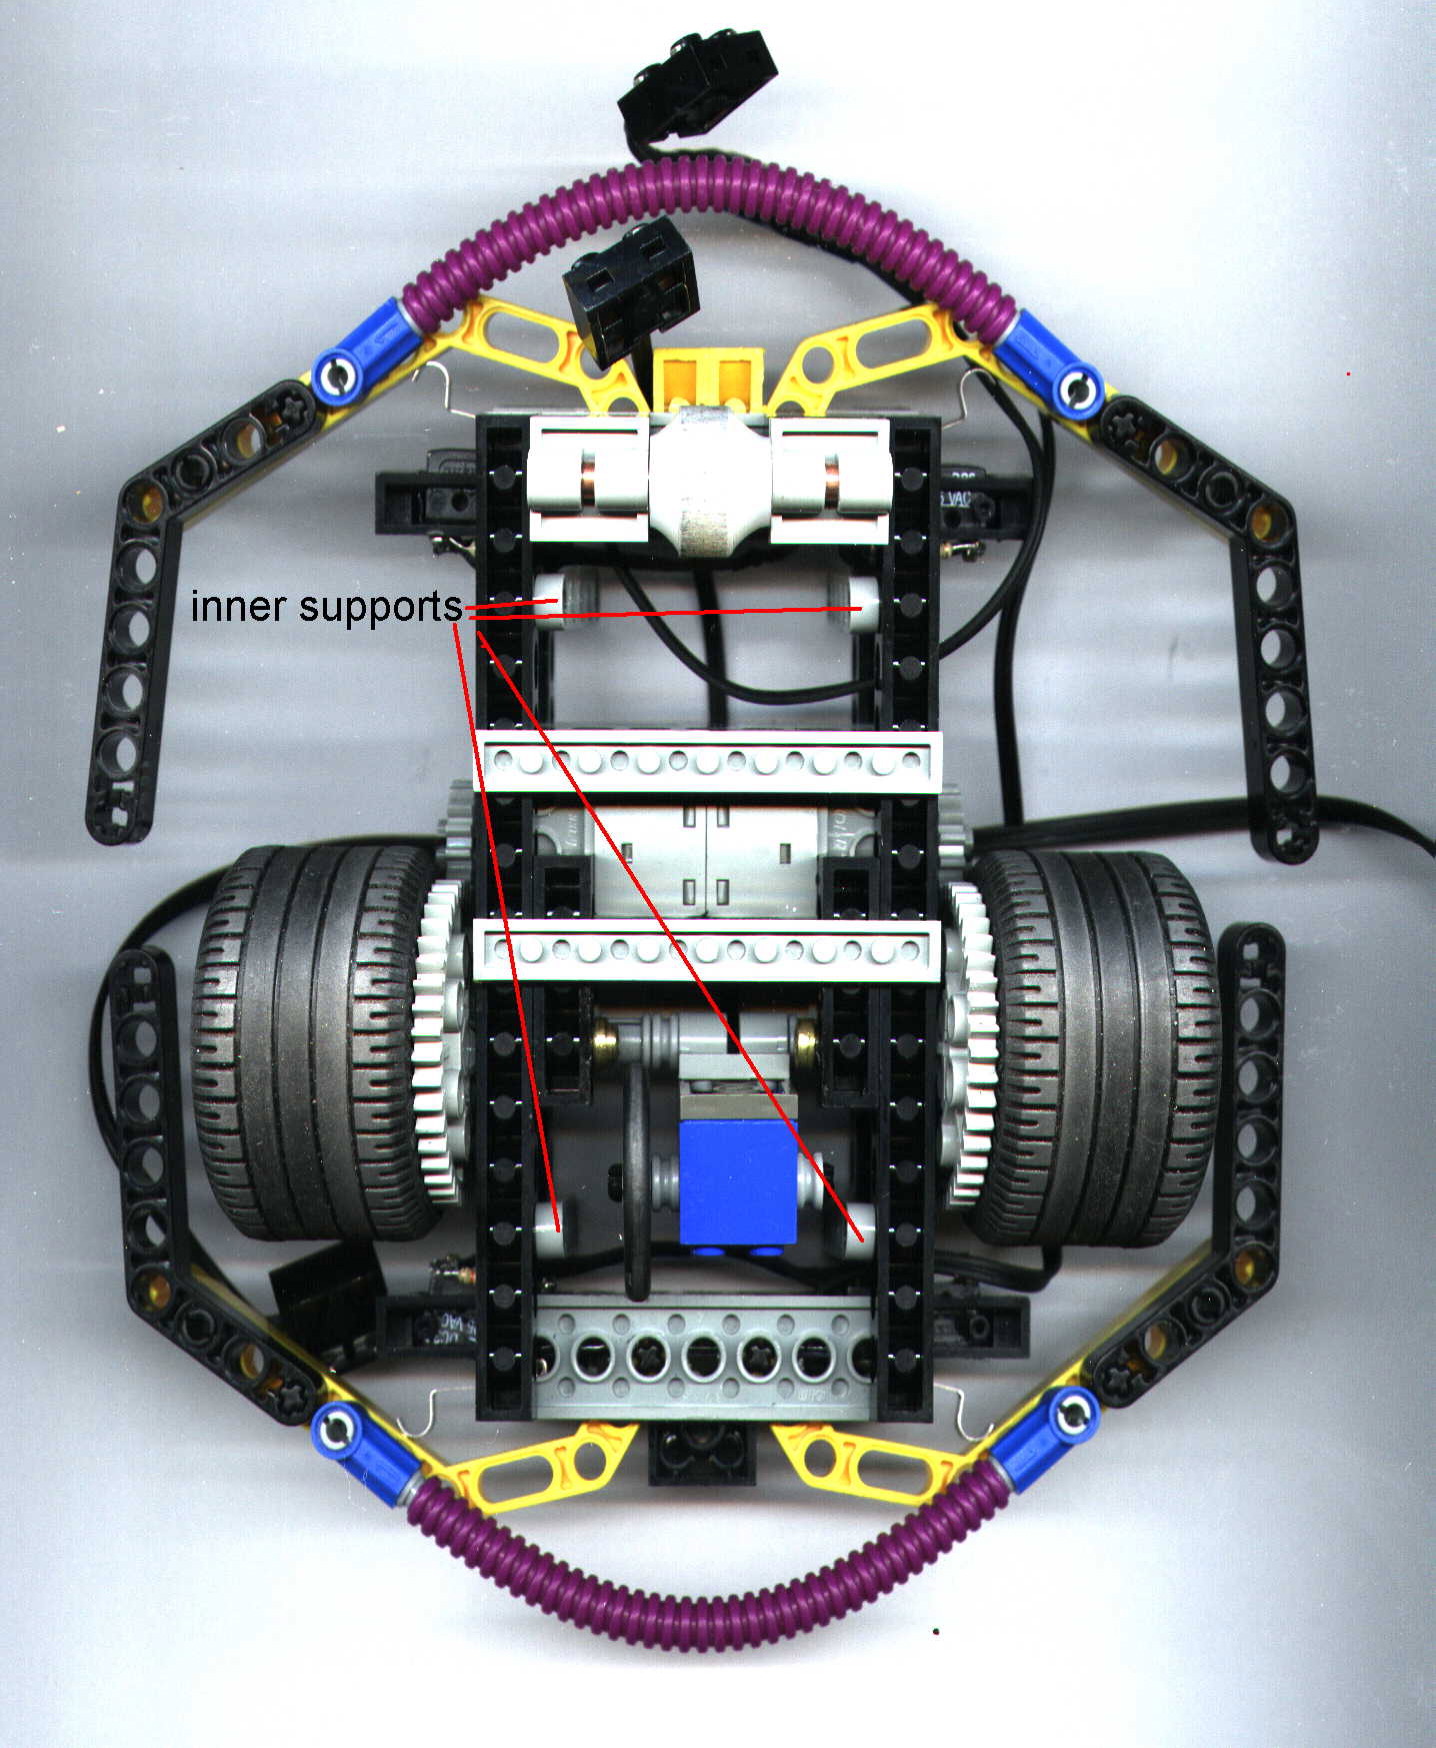
- 4 flat grey pieces with 5 holes.
These are used as inner supports.
- 12 small dark grey
halfjoints.
- 2 studs to secure the wheels.
Suggested order of construction:
(refer to pictures below for clarification)
Directions:
- Join a 1x4 beam to a 1x16 beam using
grey joints (middle hole of the 1x4 beams and 7th hole from the left
of the 1x16) With the 1x4 beam facing inward, this is now
considered to be the left side of the driving base.
- Repeat step one to create the right side. This time,
however, attach the 1x4 beam to the 9th hole from the left of the 1x16
beam.
- Place the two sides next to eachother, with small beams
inwards. The area closest to you is the back of the driving base.
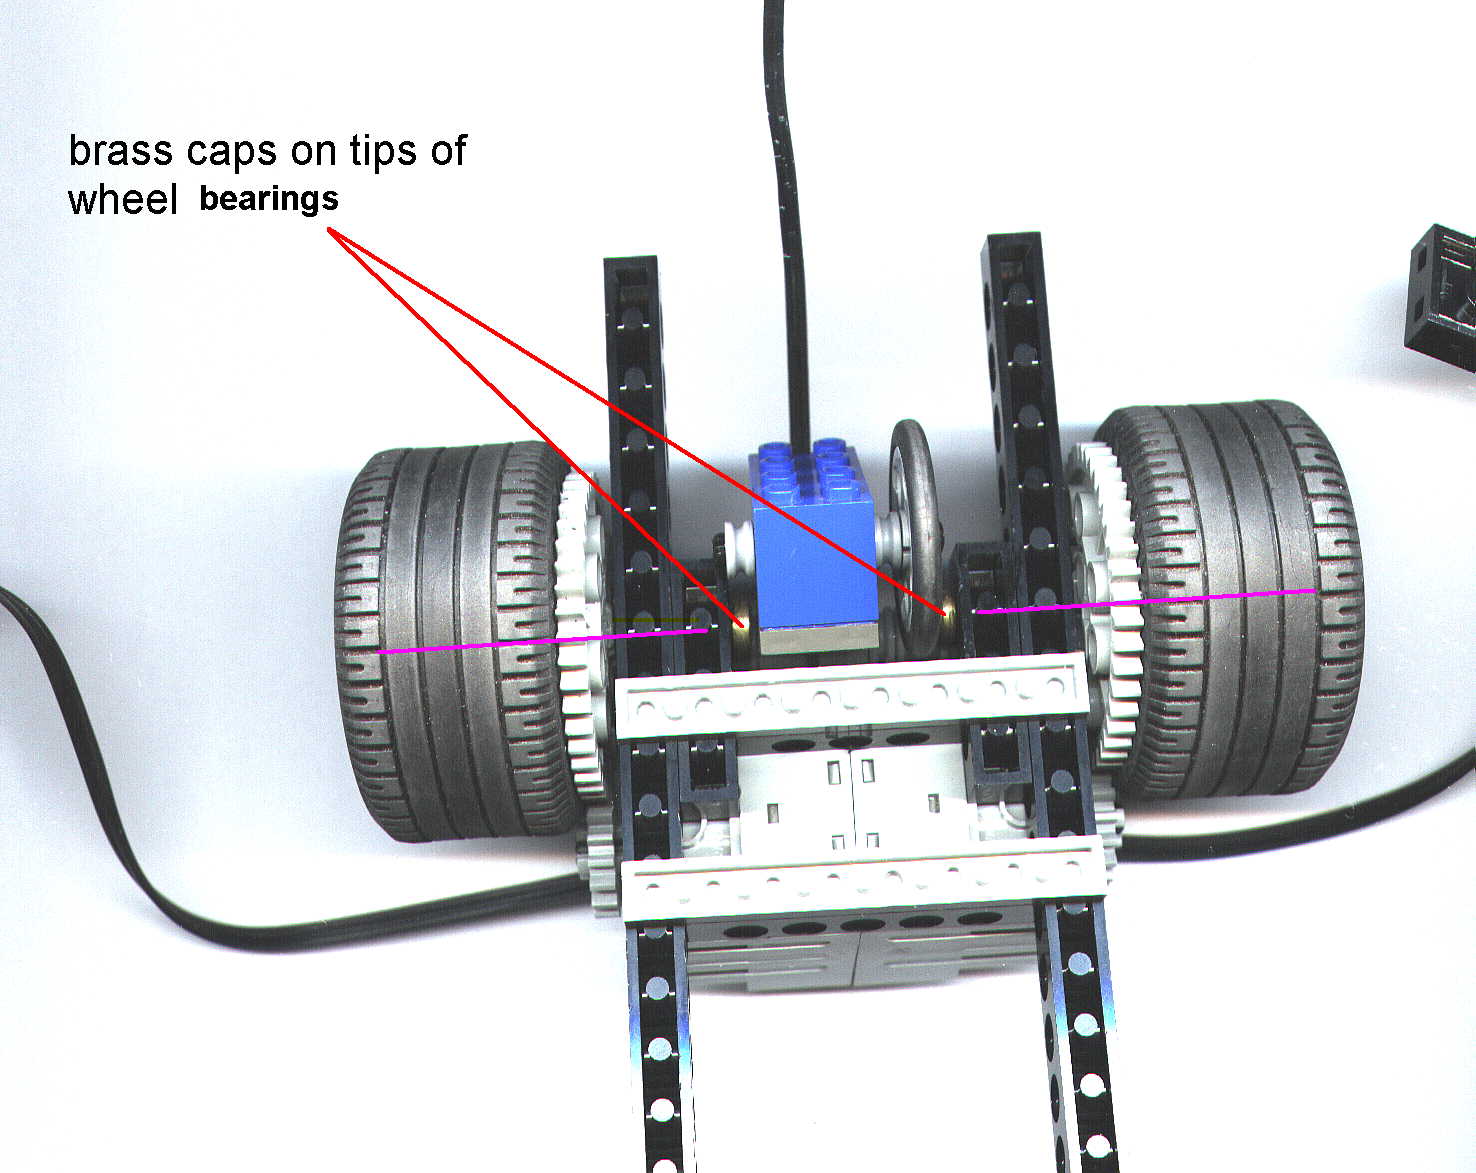
- The wheel bearings go in the 6th hole counted away from
yourself. Insert with the brass caps on the inside.
- Flip both pieces over but make sure the brass caps still
face inwards. Connect the left and right sides by attaching a 1x8 grey
beam across the 7/8 studs of the 1x16 beams
(counted away from you).
- Attach a second grey beam across the 10/11 studs of the
1x16 beams.
- Turn the piece over again, flipping it horizontally. Make
sure the brass caps are closer to you than the grey beams.
- Place a 1x4 black beam across the first grey beam, and a
1x6 black beam over the second one.
- Stack 2 (1x2) grey plates on top of each yellow
brick.
- Attach one yellow brick on 6th and 7th knob of the 1x16
black rod.
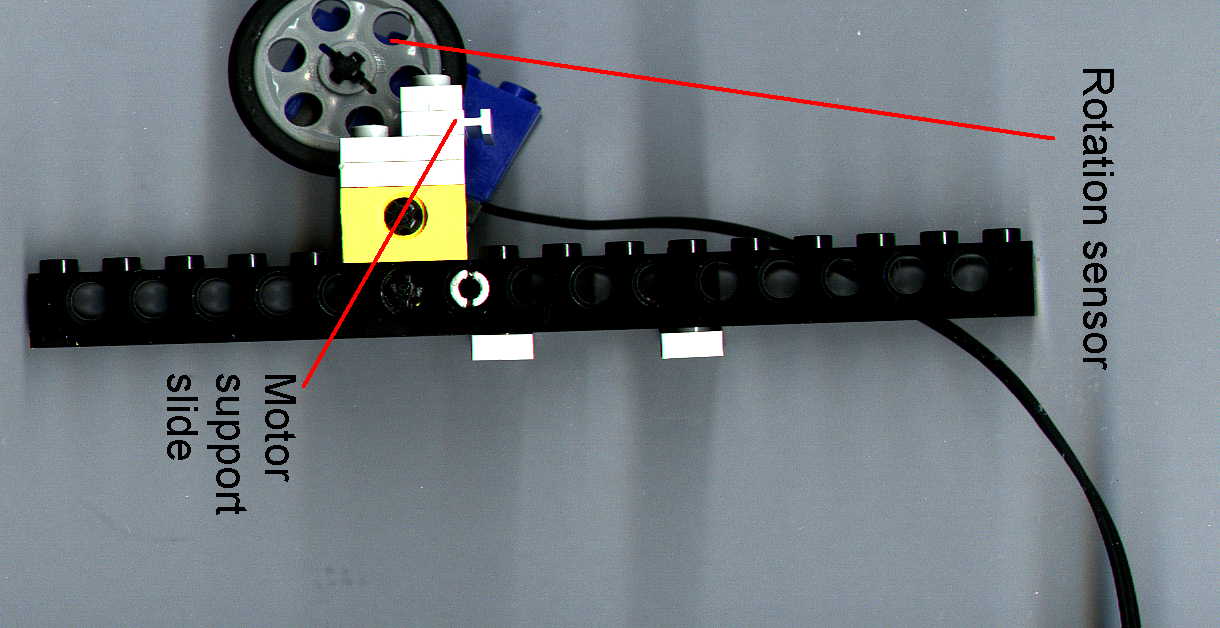
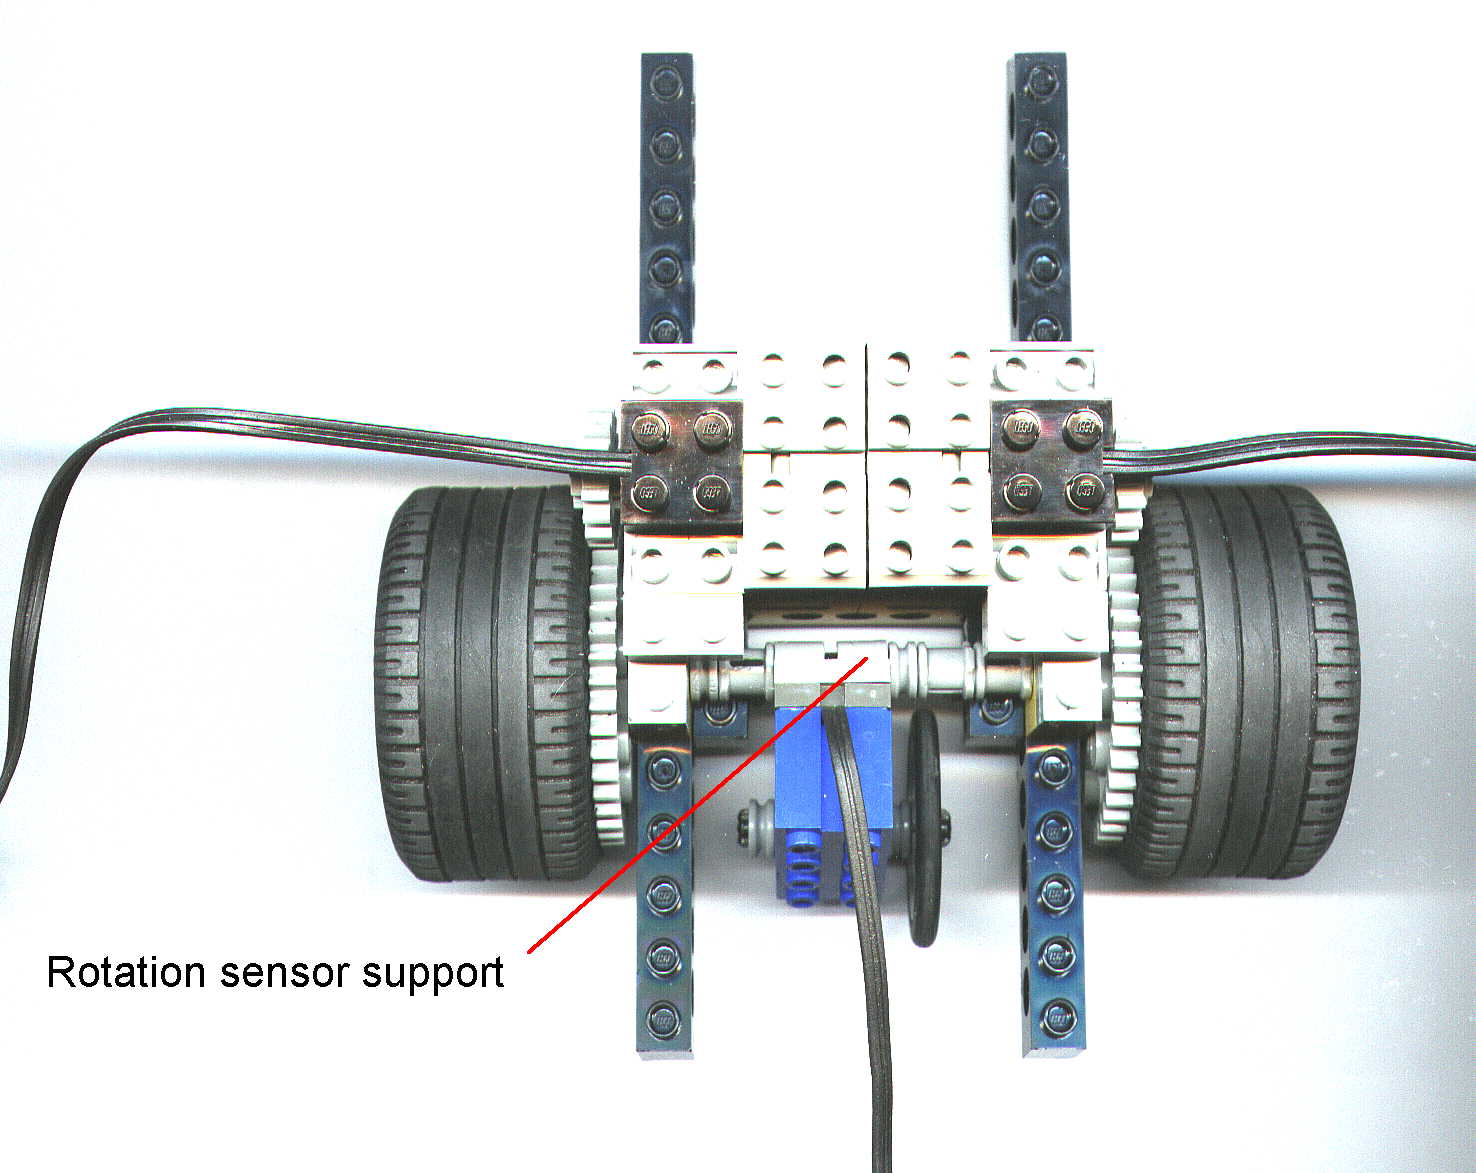
- Insert
rotation sensor, sliding it into the hole in the yellow brick. Add
the other yellow brick on the other side, attaching the other end of
the rotation sensor mount to it. The wheel should be resting on the
ground.
- Put 1 (1x2) grey plate on top of each motor mount
peice.
- Put the motors back to back, so that the rod (with
attached gear) is facing outwards. Slide a motor mount into the top
slot of each motor.
- Place the left motor onto the driving base, attaching it
to the two cross beams underneath. The gear should be facing outwards
and the outside edge of the motor should be flush with the outside edge
of the 1x16 beam. The motor mount will sit perpendicularly on top of
the grey plates that are attached to the yellow brick. Repeat for the
other side.
- Attach the large wheel gear to the wheel bearings,
pushing it in as far as possible. Then attach the wheel and secure it
with a grey stud.
- Place the front and rear bumpers on. (Remember: the rear
is the area closest to you). The bottom grey plate of the bumper is
attached to the 1x16 black beams, so that it rests perpendicular to the
rest of the driving base.
- Secure the base by placing black beams from each
motor to the egde of each bumper (2 (1x8) beams for the back and 2
(1x6) beams for the front) creating a solid base for the brick to rest
on.
- Attach the inner supports (4 rounded plate beams with 5
holes and dark grey halfjoints on each end) These supports link the top
and bottom part of the driving base. Put one support on each side,
front and back.
- Place the brick on the base and secure it with the 2
(1x6) outer support beams using one black joint for the bottom and one
dark grey halfjoint for the top of each beam. The dark greay halfjoints
attach to the brick.