Programmer's Notepad is a decent, free, and open-source editor for MS Windows recognizes (and can highlight syntax for) several different programming languages from Assembly to XML, and many others in between, including, of course, Python.
Besides syntax highlighting, PN2 has some features that are particularly useful to coders. It allows you to create Tools, such as a Run Python menu item that will call python.exe to execute your Python code without having to switch over to another window running a Python shell, such as iPython. It will then display resulting output in an output window.
Another very convenient feature is that it will group sections of code and make them collapsible so that you can hide blocks of code to make the a page or window more readable.
One feature missing from PN2 is that although it will highlight syntax, it does not (yet) automatically indent, for example, the line after a for loop. However, it will maintain the indentation of the current line, so you won't have to constantly tab within a single code block.
You can download a copy here from the SourceForge website. It should install in the directory C:\Program Files\Programmers Notepad. PN2 uses what are called schemes to define the way it recognizes languages and file types. There is a pull-down menu on the top toolbar where you can choose a scheme, but it will automatically choose the Python scheme for you if you open a file with a .py extension.
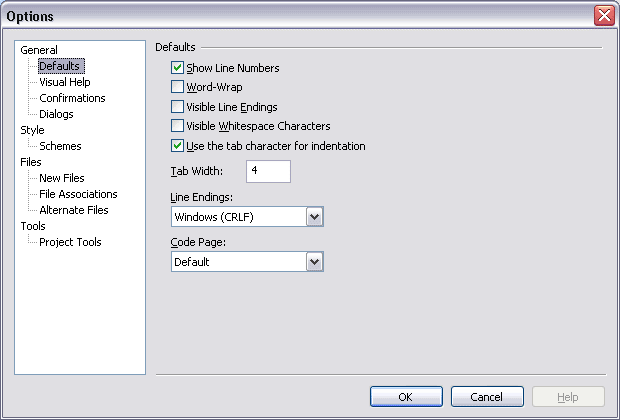
To turn on view options such as line numbers and wordwrap, go to
Tools->Options. This dialog box is where you can configure all of
the default settings. Click on Defaults for line numbers and
other options. This dialog box is also where we can add tools, such as a
Run Python tool (more on this later).

To see the effects of syntax highlighting, first choose Python from
the pull-down menu on the toolbar. Then as you enter Python code, PN2 will
color-code keywords, function names, and the like, as well as grouping
contiguous code blocks. You can see these features in action if you enter
code for iterating the logistic map:
def printIterates(OneDMap, initialConditions, nIterates):
    x=initialConditions
    for i in range(nIterates):
        x=OneDMap(x)
        print i, x

def LogisticMap(x):
    return 4.0 * x * (1.0 - x)

printIterates(LogisticMap, 0.3, 10)
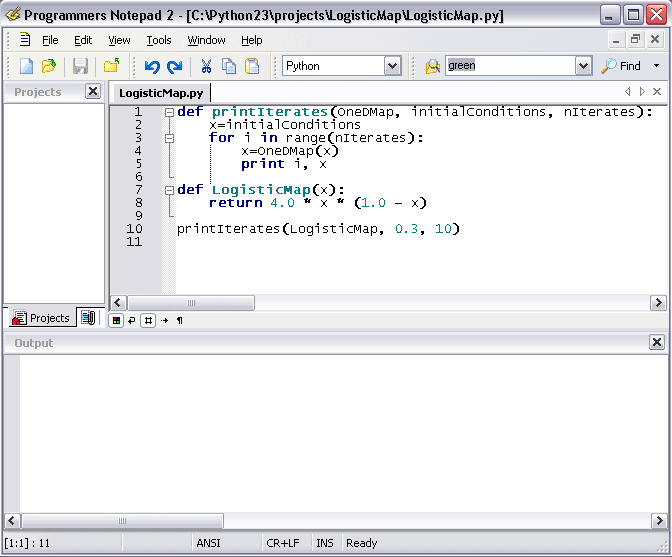
Save this as LogisticMap.py. Your editor window should look
similar to the one below:

We can add more functionality to our editor by adding a tool that lets us
execute Python code directly in the editor, without having to switch to
another Python shell window. To add a new tool, click on the
Tools->Add Tools.... This will bring up the Options dialog box.
Under the Scheme pull-down menu, make sure Python is selected since
we only want this tool to be active for the Python scheme. Then click on the
Add button. There are four fields we will need to fill in and an
optional fifth field for a shortcut key.

Click OK once these fields are entered. This will place a Run Python item under the Tools menu, but it will only appear when you are using the Python scheme.
In order to run the tool on our LogisticMap.py code, first make
sure the Output window is visible. If it is not already visible, go to
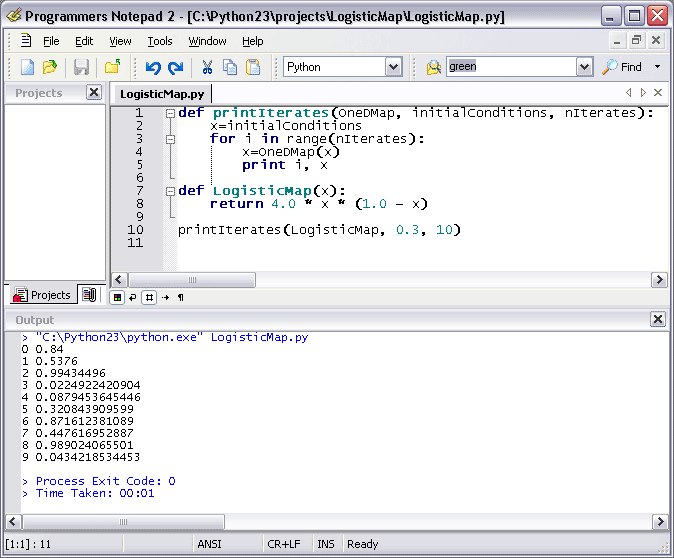
View->Output. Then go to Tools->Run Python. You should then see
numbers generated from iterating the logistic map in the Output window:
